top of page

Main Component Complete!


ree


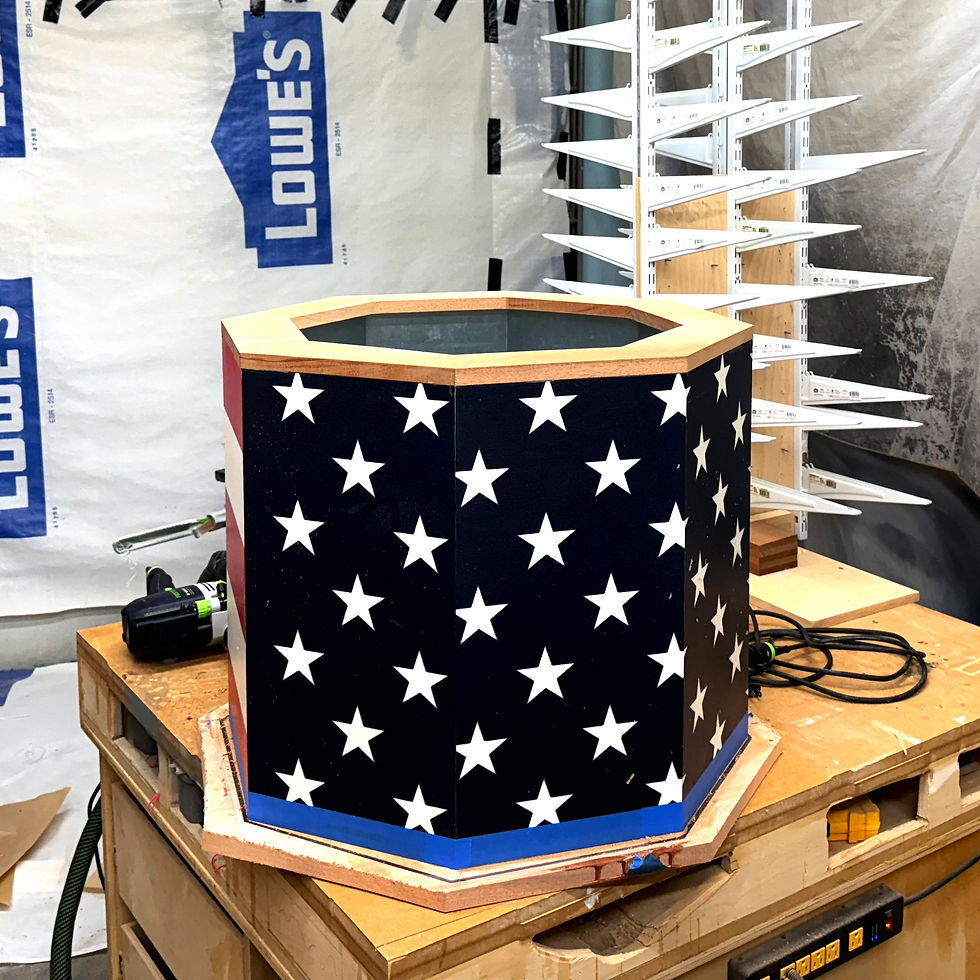
The cooler itself is now complete! The only thing left to do is design and make the lid. That's no small task and my plan is to inlay this image below.


It is going to take some testing and prototyping.  It will take a few weeks to think through this.  The cleanest approach I think is to use pigmented epoxy and run 4 individual stages.
It is going to take some testing and prototyping. It will take a few weeks to think through this. The cleanest approach I think is to use pigmented epoxy and run 4 individual stages.

Here is a pic of completing the final closed cell insulation install.  Note the wood braces on the outside.  This is to ensure that the cooler is rock solid and can handle a lot of weight.  In hindsight, I would use smaller braces and cover them up to eliminate "thermal bridging".  But let's face it, there are other non-insulated areas and this is certainly not the weak link.  Total insulation took 40 square feet.
Here is a pic of completing the final closed cell insulation install. Note the wood braces on the outside. This is to ensure that the cooler is rock solid and can handle a lot of weight. In hindsight, I would use smaller braces and cover them up to eliminate "thermal bridging". But let's face it, there are other non-insulated areas and this is certainly not the weak link. Total insulation took 40 square feet.


Note here that I kept the middle section free of insulation.  I wanted Melissa and Ben to have the ability to switch out the drain component if necessary.  I do expect there to be some condensation that builds here but it should be fine since I designed a lot of air flow underneath.
Note here that I kept the middle section free of insulation. I wanted Melissa and Ben to have the ability to switch out the drain component if necessary. I do expect there to be some condensation that builds here but it should be fine since I designed a lot of air flow underneath.


Once the insulation was complete, it's time to attach the top and bottom lids and flush trim them to the center flag.


Here is the start of the flush trimming.


And the top is complete.


Here is a pic of the top and bottom lids finished with several coats of finish as I married the lids to the center flag.

Now it's time to build the base.  Here I am starting with 2 in thick Mahogany lumber.
Now it's time to build the base. Here I am starting with 2 in thick Mahogany lumber.


I cut the lumber to raw dimensions.


And then dimensionalized it for the build.


Here is the glue up.   Many clamps are necessary to achieve a solid and perfect build
Here is the glue up. Many clamps are necessary to achieve a solid and perfect build


I selected extra heavy duty casters.  I hate it when manufacturers under size their casters and I am an "overkill" designer.
I selected extra heavy duty casters. I hate it when manufacturers under size their casters and I am an "overkill" designer.


If you inspect the previous image, you will notice that I bolted the casters to the wrong side!  That's 20 minutes I will never get back.
If you inspect the previous image, you will notice that I bolted the casters to the wrong side! That's 20 minutes I will never get back.


Here is the completed main cooler.


And what the inside looks like.


This is a pic next to my old cedar cooler.  Notice how tall the flag cooler is.  I think it might look and perform better without the base!  If so, the wheels will bolt directly to the bottom and I will leave that option to Melissa and Ben.
This is a pic next to my old cedar cooler. Notice how tall the flag cooler is. I think it might look and perform better without the base! If so, the wheels will bolt directly to the bottom and I will leave that option to Melissa and Ben.


What did this stage cost?


The mahogany lumber for the based came in at $170.


The bolts and wheels came in at $20.00 + $56.99 respectively


Totaling - $246.99

What is the next stage?


Designing and building the lid.

Have any questions? Ask away!


Mark Petrilla, Gorilla Bark Studio's

Paying tribute to those who keep us safe.


Comments

Rated 0 out of 5 stars.
No ratings yet

Add a rating
bottom of page