top of page

Completing the In-Shop build

This table build has two phases, In-Shop and Onsite. This blog completes the In-Shop phase


Here is the full table top (dry fitted) measuring 8 feet long and 3 and a half feet wide and it's 3 and a half inches thick.


Here is a pic of the base being prepped with dowels for glue up.  The dowels are not here for strength, they are to help with alignment.
Here is a pic of the base being prepped with dowels for glue up. The dowels are not here for strength, they are to help with alignment.
Here the bases after glue-up and a 22 degree angle cut on the ends.


Here is the spray process for the bases.  Five coats were applied with P2K Polyurethane finish.
Here is the spray process for the bases. Five coats were applied with P2K Polyurethane finish.


This is the main table top section.  The dowels are in and I am cutting a straight edge on both ends.
This is the main table top section. The dowels are in and I am cutting a straight edge on both ends.


The CNC is the best tool to route a groove on both ends.


Note the groove cut on the ends with the end caps on top.  The table is upside down in this picture. This completes the table top and is ready for transport.  The final glue up will happen onsite because of the size and weight of this table.
Note the groove cut on the ends with the end caps on top. The table is upside down in this picture. This completes the table top and is ready for transport. The final glue up will happen onsite because of the size and weight of this table.


Now I turn my attention to the bottom trestle beam.  This is where the USMC personalizations will take place.
Now I turn my attention to the bottom trestle beam. This is where the USMC personalizations will take place.


Jeff took this picture off of his truck decal and asked if I can do anything like this.

After a lot of design work and testing, I worked up these two test runs to see if I could pull it off.  While it does not look very good here, I intentionally took short cuts since the purpose of these is to see if I could get them right.  I used exotic veneer woods through-out.
After a lot of design work and testing, I worked up these two test runs to see if I could pull it off. While it does not look very good here, I intentionally took short cuts since the purpose of these is to see if I could get them right. I used exotic veneer woods through-out.


The first step is to laser the outside circle and inlay bleached white sycamore veneer.


Each step is a long and tedious process of lasering the pocket, then lasering the inlay veneer and fitting it inside and epoxying in place.  Then applying a sanding sealer finish to lock in the pores.
Each step is a long and tedious process of lasering the pocket, then lasering the inlay veneer and fitting it inside and epoxying in place. Then applying a sanding sealer finish to lock in the pores.

Here is a picture of the completed white circle.

Then I place it back in the laser and apply the next color step of pocket, inlay, clamping and sanding sealer.  I do this over and over similar to how Silk Screening is performed.
Then I place it back in the laser and apply the next color step of pocket, inlay, clamping and sanding sealer. I do this over and over similar to how Silk Screening is performed.

Here is a pic of starting the third layer of the image.


And here I am starting the fourth layer of the image.


Epoxying, clamping and sanding sealer every step of the way.


We are getting closer!  One more stage to add the wording in the white section.
We are getting closer! One more stage to add the wording in the white section.


After completing all four of the images, I then glued up all three boards to create the beam.  Once it was glued up, jointing and planing was required to dimensionalize it into the exact size.
After completing all four of the images, I then glued up all three boards to create the beam. Once it was glued up, jointing and planing was required to dimensionalize it into the exact size.

Then it's off to my CNC to route out the trestle pin that will keep the base in place.


And I also used my CNC to cut the hole in the bases that the trestle beam will fit through.


Since we have come this far, I searched out this Desert Storm coin to commemorate his service in the Gulf War


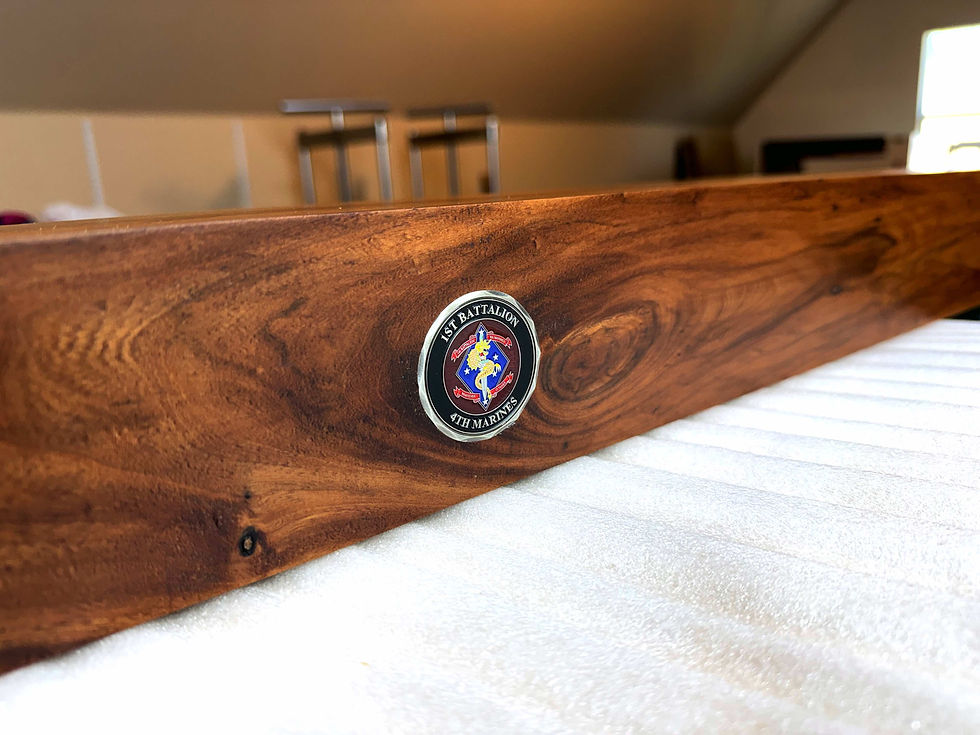
And managed to find his Marine Company coin so I inlayed that in too!


Next week, I pack everything up and head on-site to glue up the table top and prep it for P2K finishing.


If you have any questions; as always, feel free to ping me!


Mark,


2 Comments

Rated 0 out of 5 stars.
No ratings yet

Add a rating
Guest
5 days ago
Rated 5 out of 5 stars.

This is a awesome table that means a lot and took almost 4 years to come to fruition thank you for all the creative and attention to detail

This is a real piece of art and I am proud to have it


Like
Mark Petrilla
5 days ago
Replying to

It’s going to be sharp! Glad I am able to build it for you.

Like
bottom of page