top of page

The Final Stage & Delivery!

Here is the onsite build and setup. See the completed table.


It's in its final resting space ready to be enjoyed for decades.

Since this table is so large and heavy, I needed to transport un-glued.  So I came in and performed the glue-up late the first night on his gazebo.  This is a pic of the middle section.  I glued this up first using Titebond III.
Since this table is so large and heavy, I needed to transport un-glued. So I came in and performed the glue-up late the first night on his gazebo. This is a pic of the middle section. I glued this up first using Titebond III.
Once the middle section was correctly set, I added the two end-caps by epoxying them in.

Once everything dried and cured, I removed the clamps and turned it on it's side to pour additional epoxy into the tongue and grove sides of the end-caps.

In retrospect, for future table builds, I will float this end-cap to account for wood movement.  I used this approach on the table I built 12 years ago and have not seen any cracking; however, there is a better way to design the end-caps so they are able to handle wood movement over time.
In retrospect, for future table builds, I will float this end-cap to account for wood movement. I used this approach on the table I built 12 years ago and have not seen any cracking; however, there is a better way to design the end-caps so they are able to handle wood movement over time.

Here is a picture of the top side after hours of sanding progressing through 60, 80, 120, 180, 220, 320 and 400 grit.

Not the Spaltic texture.  It is going to deliver some incredible personality!
Not the Spaltic texture. It is going to deliver some incredible personality!

This is the first coat of brushed on sanding sealer.  This will lock in the pores so the coloring does not change during the rest of the process.  I performed this on both sides.
This is the first coat of brushed on sanding sealer. This will lock in the pores so the coloring does not change during the rest of the process. I performed this on both sides.

After the sanding sealer cured, I performed additional sanding with 220, 320, 400 and 600 grit.

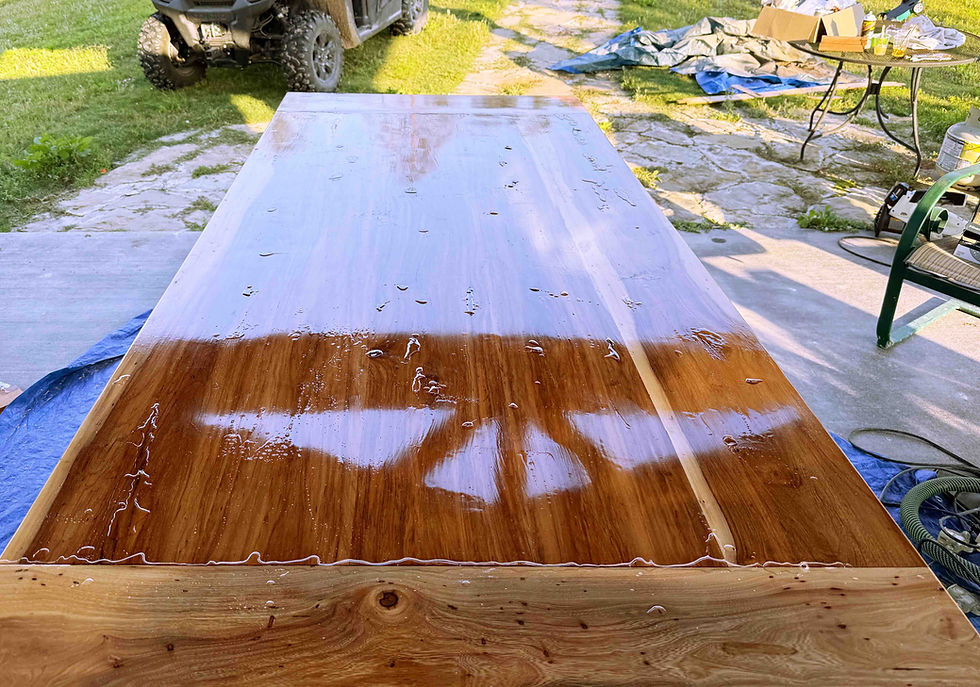
And then applied the first coat of P2K Poly high gloss finish.  This finish is incredibly strong and vibrant locking in everything.
And then applied the first coat of P2K Poly high gloss finish. This finish is incredibly strong and vibrant locking in everything.

Once that cured, I went over the table one final time looking for any imperfection, crack or pit and applied epoxy so we can ensure a perfectly flat level table.  I performed this after the previous coats because in doing it first, it eliminate any shadowing that the epoxy may create on bare wood.
Once that cured, I went over the table one final time looking for any imperfection, crack or pit and applied epoxy so we can ensure a perfectly flat level table. I performed this after the previous coats because in doing it first, it eliminate any shadowing that the epoxy may create on bare wood.

And after that cures, I once again progress through hours of sanding at 120, 180, 220, 320, 400, 600 grit.

Here is the first of two more P2K Poly Matte finishes.  Since I sprayed outside, note the sun creeping in to the edge of the table.  I need to correct that asap!
Here is the first of two more P2K Poly Matte finishes. Since I sprayed outside, note the sun creeping in to the edge of the table. I need to correct that asap!

And here is what I quickly came up with.  I propped up some chairs and draped a tarp over it to get the direct sunlight off the table while it continues to cure.
And here is what I quickly came up with. I propped up some chairs and draped a tarp over it to get the direct sunlight off the table while it continues to cure.

Here we are with the final table as it cures the rest of the day!

It's now ready to move into the house on top of the base.

Here is the base setup ready for the very heavy table top.

And here is a pic of his USMC Company logo inlayed using exotic veneers.

And this is the other side where I designed the USMC logo and added his Desert Storm Dates using an inlay with Silver KOA
I inlayed two coins highlighting his company and the gulf war on both sides of the trestle beam underneath.

The table in it's final resting space.  I expect Jeff to enjoy decades of amazing meals and memories on this spot!
The table in it's final resting space. I expect Jeff to enjoy decades of amazing meals and memories on this spot!

A table for an amazing Patriot!  Thanks for your service.
A table for an amazing Patriot! Thanks for your service.

If you have any questions; as always, feel free to ping me!


Mark,


2 Comments

Rated 0 out of 5 stars.
No ratings yet

Add a rating
Guest
17 hours ago
Rated 5 out of 5 stars.

Beautiful!

Like
Mark Petrilla
16 hours ago
Replying to

Thanks, it will last decades.

Like
bottom of page